SMS has two main tools that allow you to create prescription maps, both will result in Rx maps being created but they go about it in different ways.
- Using the Prescription Editor
-
Using the Equation Based Analysis tool (Advanced only)
Prescription Editor
Creating Rx maps in SMS Basic can be as simple as creating a map, adjusting your legend and using the built in wizard to walk you through the process. This tool is also available in SMS Advanced.
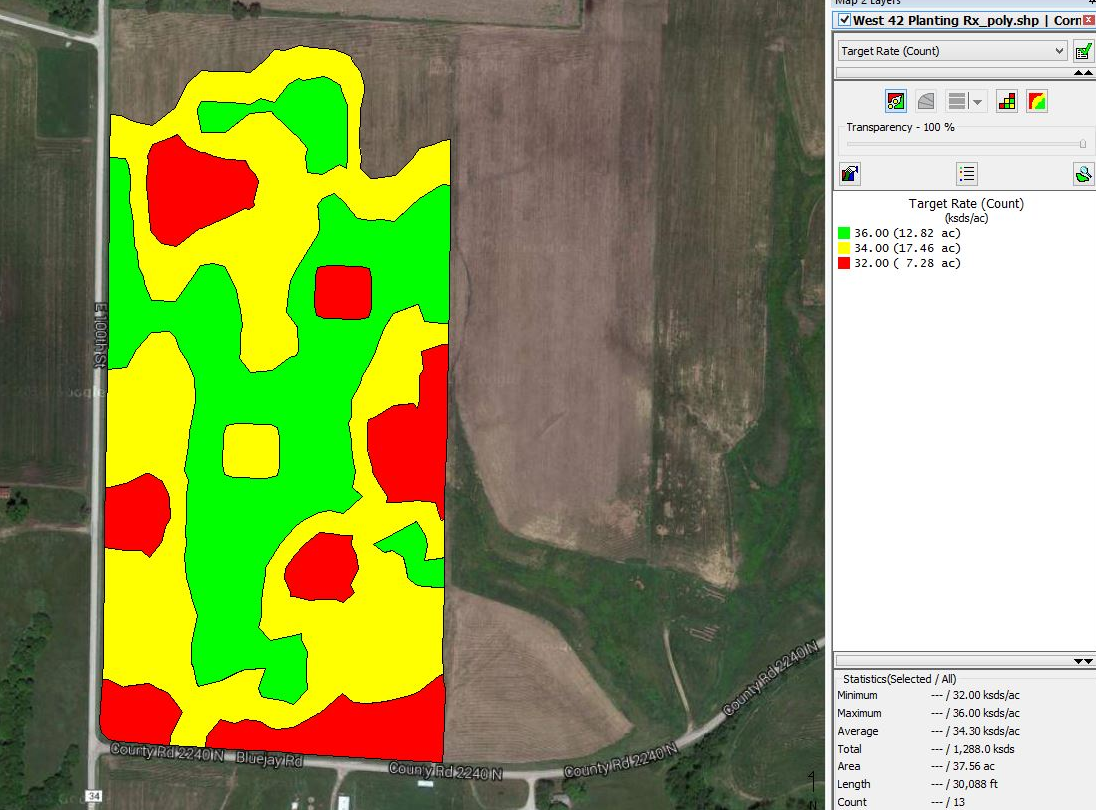
- Create a map of the data you want to reference to create the prescription (for example, a grain harvest map).
- Note: The map can be in a base, swath, grid, or contour format.
- Click on File > New > Prescription Layer.
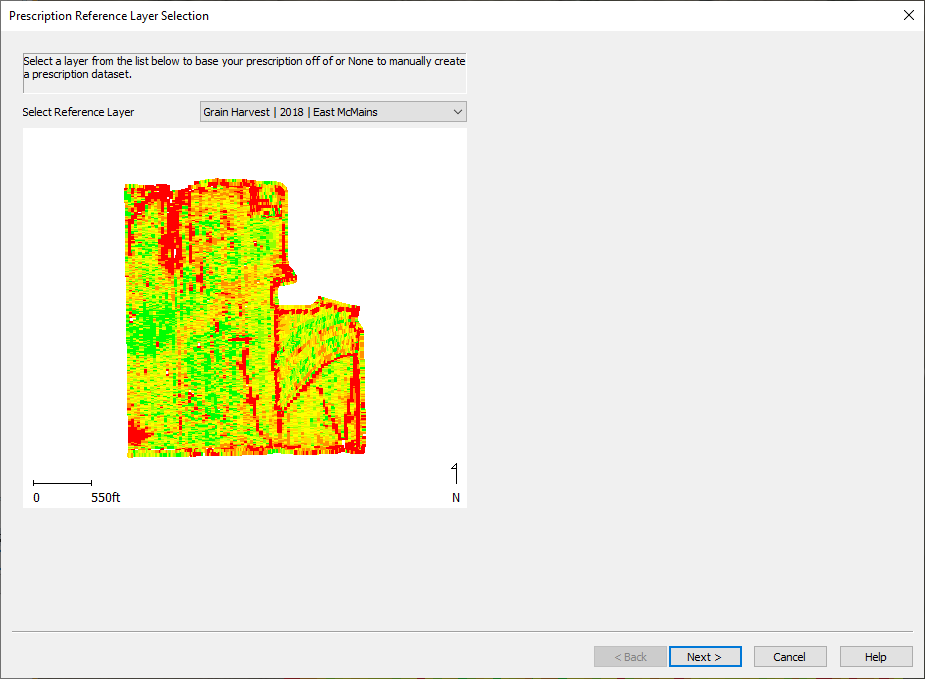
- Select the Reference layer.
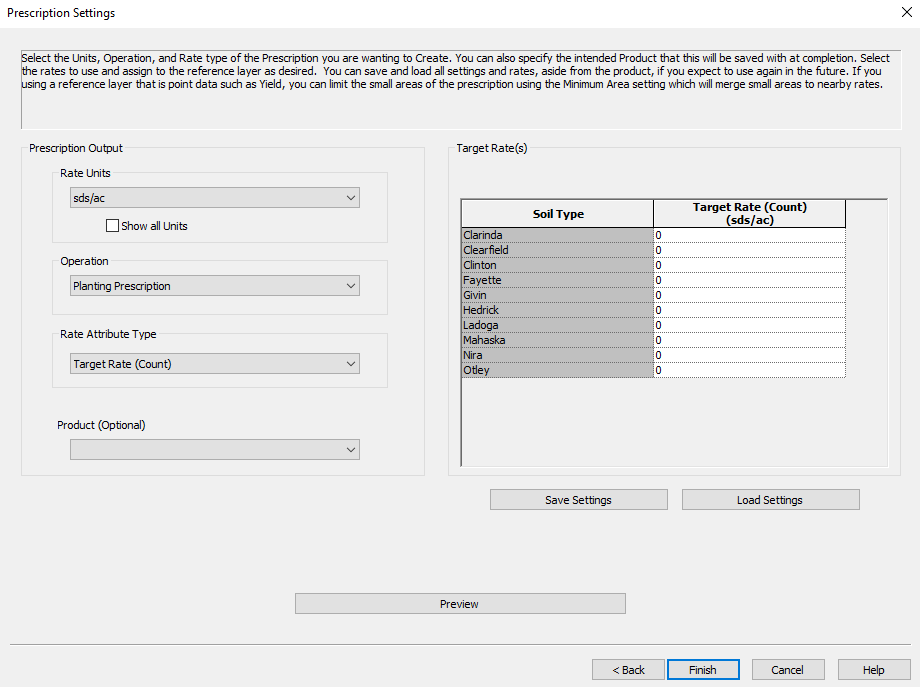
- Select the prescription output and enter the rates for the prescription.
- NH3 prescriptions should be created using the Target Rate (Mass) attribute.
- When the minimum area is check marked it is merging small areas.
-
Auto = is based on the size of the field.
Field 0-300 acres = 0.5 acre
Field 300-800 acres = 1 acre
Field 800+ acres = 1.5 acre
-
-
- Fixed = the user defines the smallest area on the map.
- Settings entered can be saved and loaded for future prescriptions by using the Save and Load Settings box
- All entries will be saved (rate units, operation, product and rates) when using the Save Settings button
- Click Finish. The prescription is generated. The Prescription Editor opens.
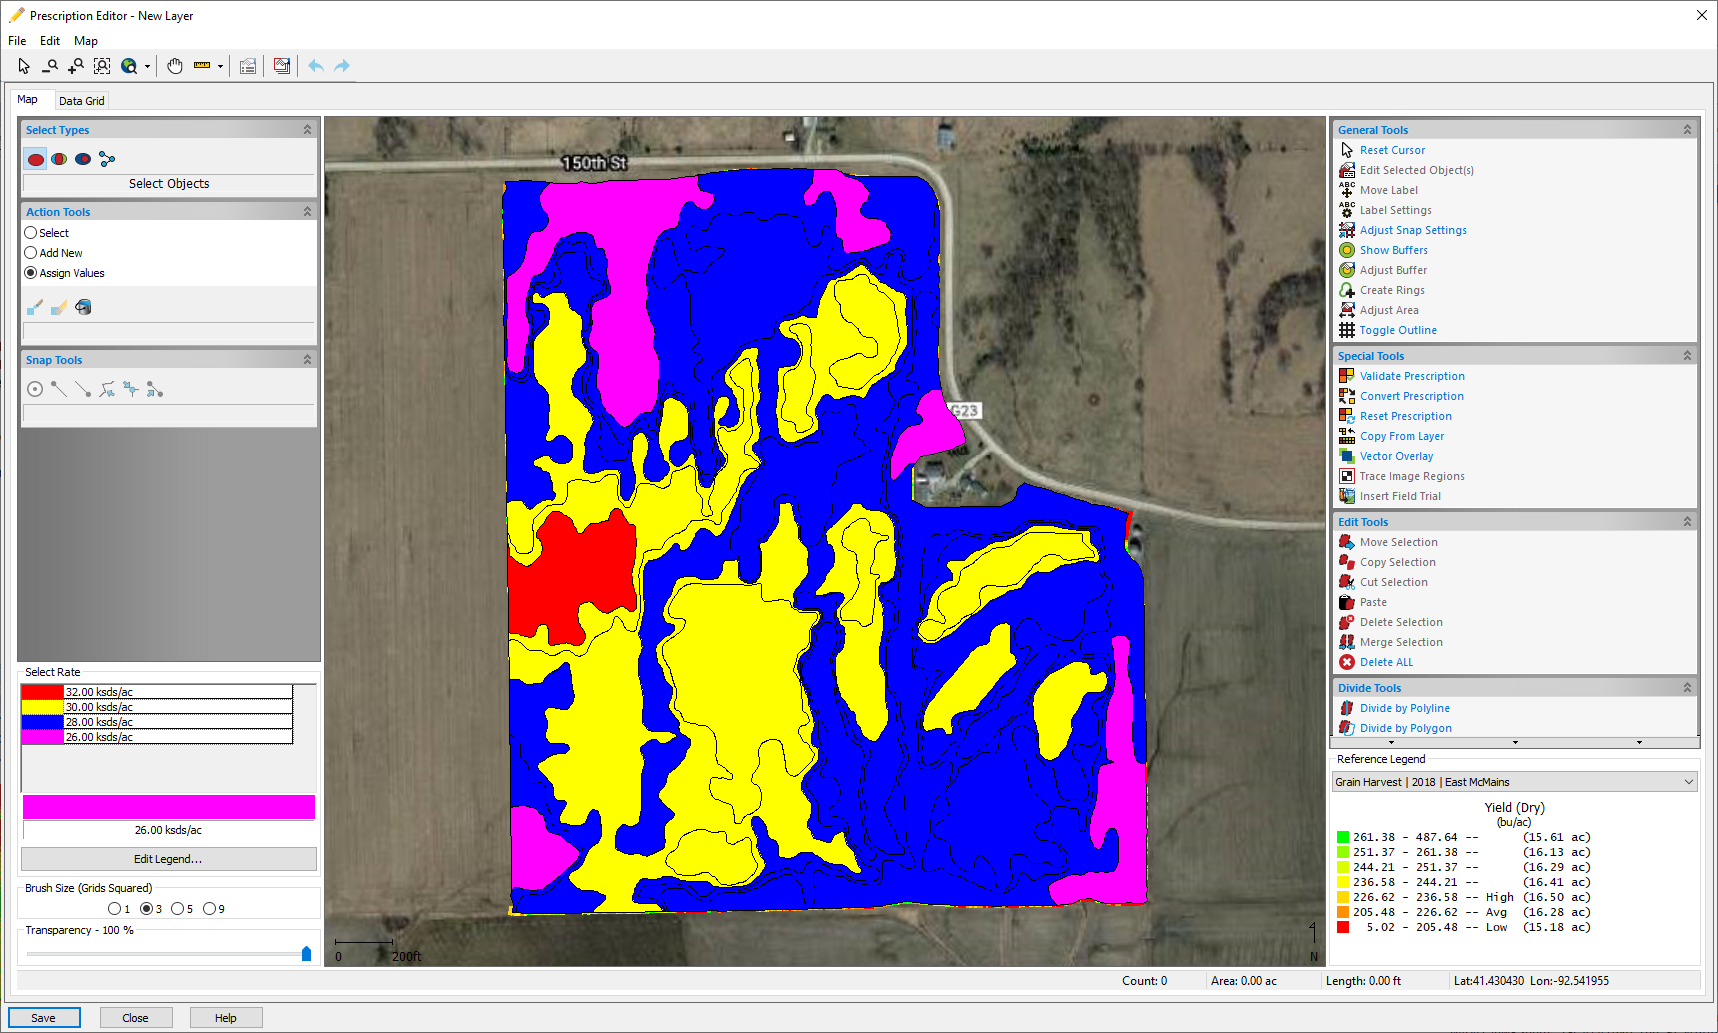
- A few tools that can be used in the Prescription Editor are:
- Edit the legend.
- Reset Prescription: can be used it the user wants to redo the prescription.
- Validate Prescription: Verifies if there is an area that currently does not have a rate assigned to it or one that is overlapping another rate. Select a Target Rate from the list of available rates to assign to the currently selected area. Click Apply to All Items to apply the current rate to all the items that have been detected.
- When saving the prescription to the management tree, it needs to be saved using the Fertilizing Prescription (Dry) operation.
Useful Tips
- You can streamline the process by first editing you legend to reflect the areas where you would like to apply different rates
- Edit the legend by double clicking on it
- If you would like to make any changes to the Rx after saving it, map the layer, right-click and choose Edit Layer to get back into the Prescription Editor
- Sometimes merging prescriptions is necessary.
- Put both maps on the same map.
- Create a new prescription for one field.
- Copy from Layer to bring the other prescription across.
- Save the combine prescription.
Common Issues
- When going through the various steps to create your Rx, make sure to choose the correct units
- SMS will use a set default unit, ksds/ac for example, and if you want to use sds/ac make sure to change it at the Prescription Attribute Type and Units Selection page
- Avoid changing the Rate Attribute Type on the Prescription Attribute Type and Units Selection page as it could result in your Rx not exporting correctly
- When saving a prescription to the management tree, make sure you select a product when saving the dataset.
- If no product is included when saving, SMS may error out, resulting in you having to remake the prescription.
SMS Quick Tip: Side-dressing prescription in SMS
Equation Based Analysis
Equation based analysis allows the user to build an equation that will determine, based on field specific inputs, how much product is required. Equations allow you to utilise multiple inputs, prompts, sub-equations and more, to precisely determine how much product you need and where that product is needed.
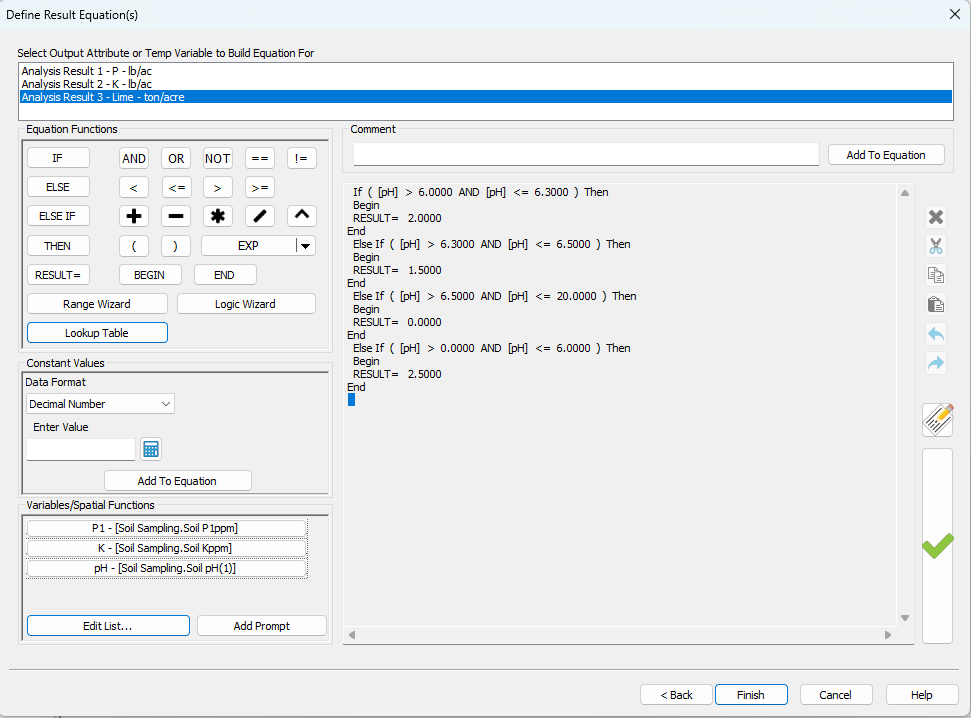
Useful Tips
- When creating equations, make sure everything is setup correctly as this will help to ensure that the resulting Rx map is also correct
- Use a descriptive name as it will help separate each Rx from the other saved analysis functions
- Choose the correct input datasets in order to ensure that your resulting Rx will be accurate
- Choose the correct output attribute(s) and units in order to ensure that the Rx can be both exported and loaded into your field display
- Output attributes are the units that your newly created Rx will use. For example, if you create a planting prescription, you will want to use ksds or sds/ac in order to ensure your planter monitor will be able to import it
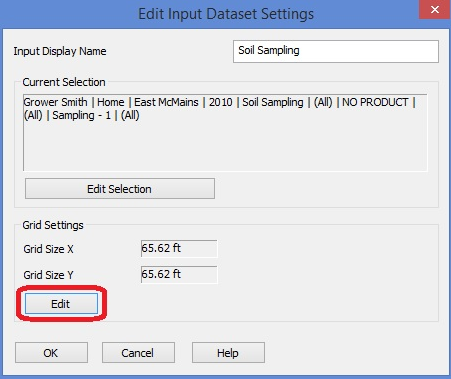
- When adding input datasets, especially if using inputs like soil sampling, make sure to note and set the interpolation settings correctly
- These settings can be found by clicking the edit button shown below and will be dictated by your specific input dataset
- Utilise the Check Equation to Verify button frequently when writing your equation
- This can help point out syntax issues early, preventing headaches later on
- Utilise the three wizards, Range, Logic and Lookup Table, to help learn and streamline this process
- The wizards can be used together and are editable after being added to the equation
- You can use the range wizard to create the basic outline then edit the Result Equals To section to further customise your analysis
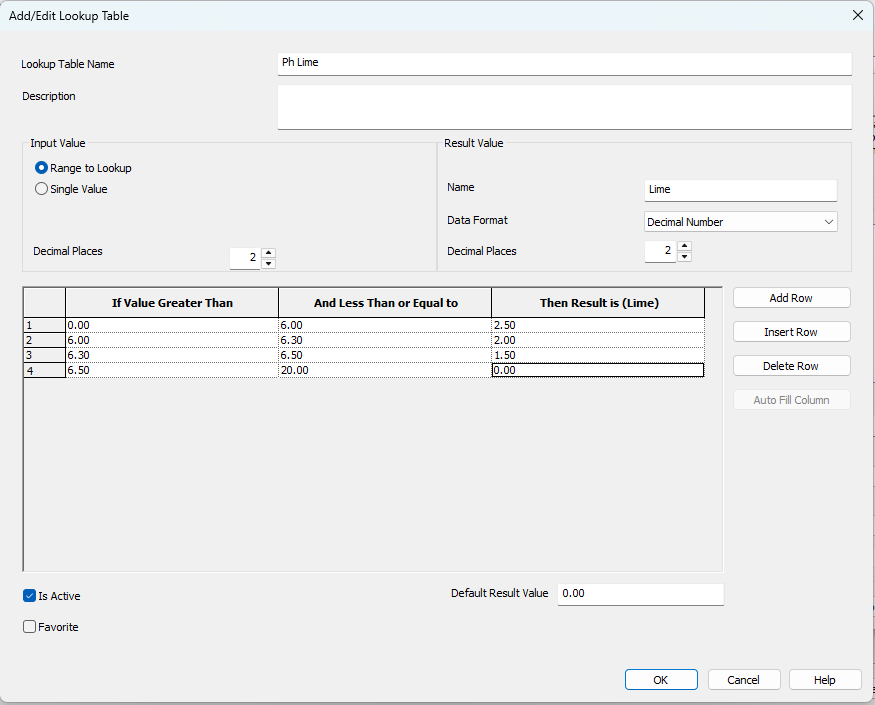
- The Lookup Table can help streamline equations by replacing repetitive equations.
For example:
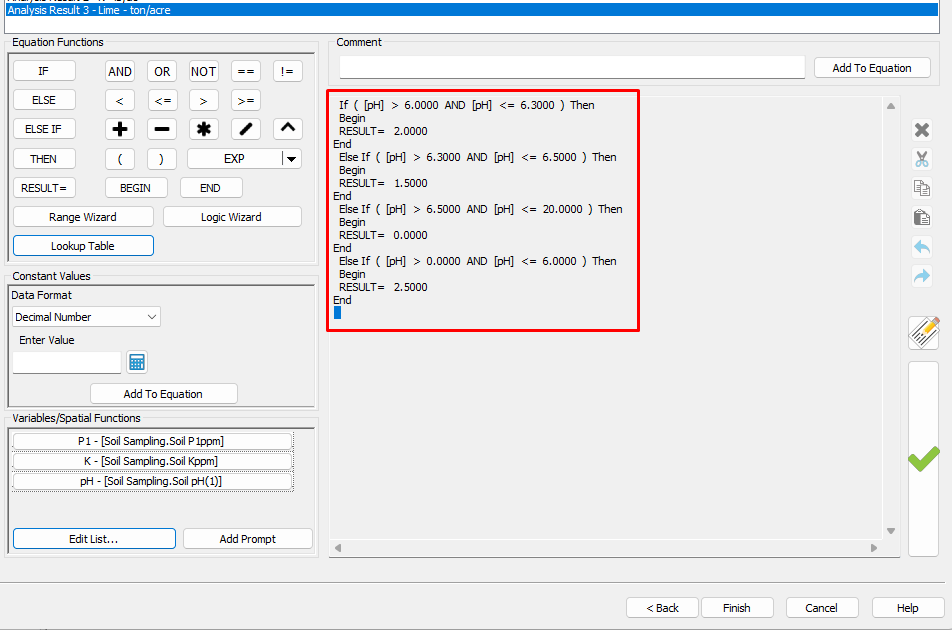
Inserting a Lookup Table starts by creating the equation. Notice how the equations above are inserted into the table below.
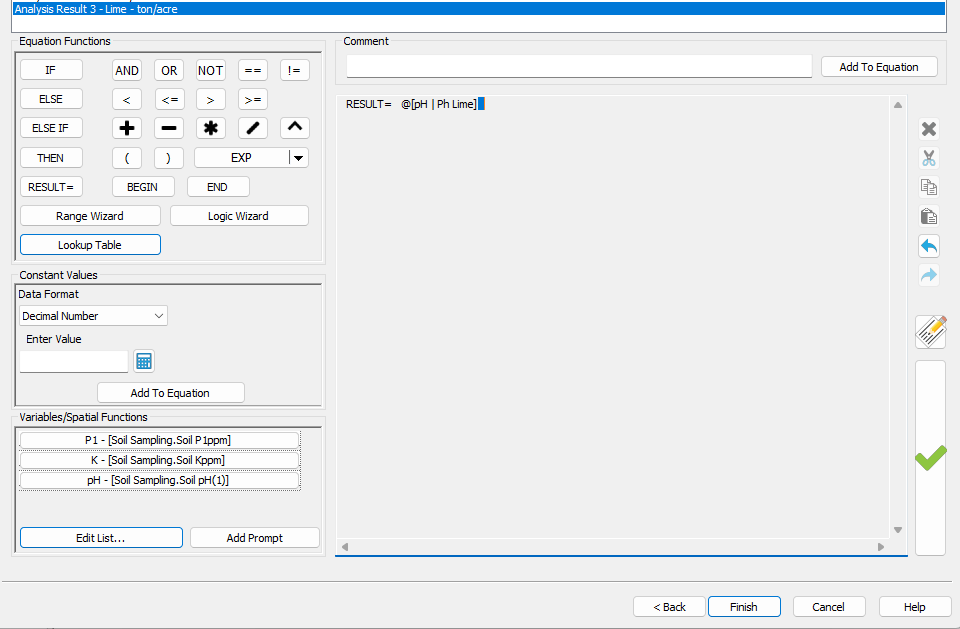
The Lookup Table is then replaced in the equation wizard.
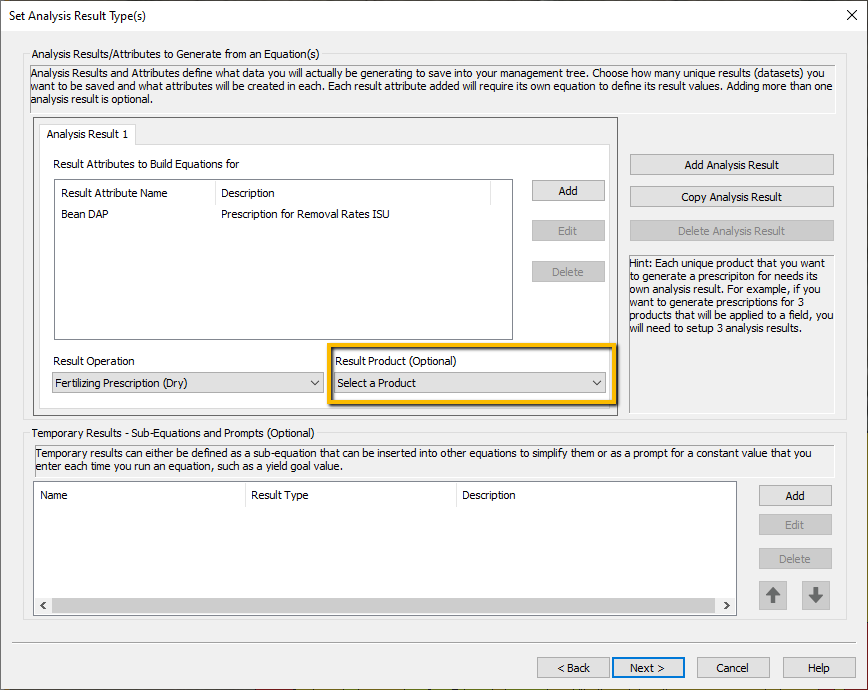
- The user can add the product that the prescription is being created for while creating the equation.
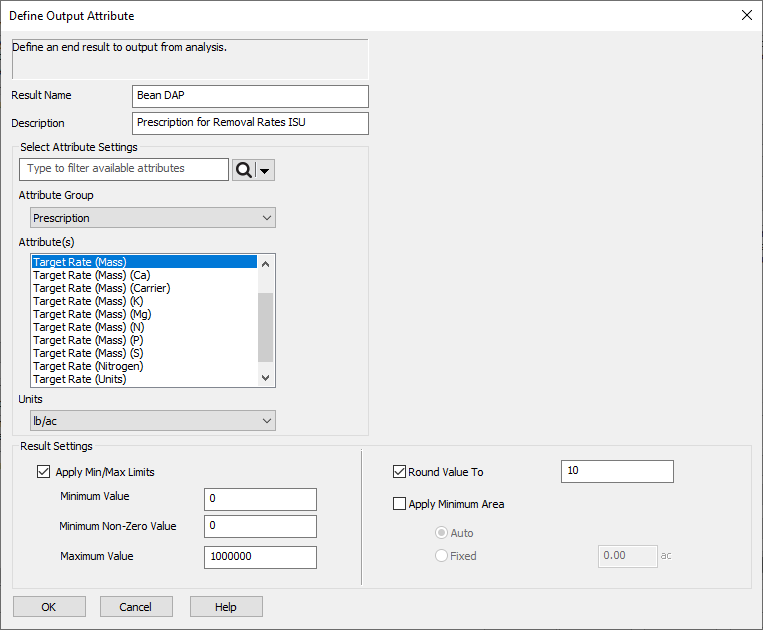
- When adding the result name and attribute for the prescription the user can edit the Result Settings.
- Apply Min/Max Limits
- Minimum and Maximum: Amounts of fertilizer that is dispensed. The minimum is usually set to 0. The maximum can be set to the most that you would apply.
- Minimum Non-Zero Value: Defines the minimum value that can be applied that is not zero.
- Round Value To: Rates that are calculated are rounded so that there are not a high number of rates. Recommended no less than a value of 10 for dry fertilizer, or 1 for liquid based products.
- When Apply Minimum Area is checked it is merging small areas.
- Auto = is based on the size of the field.
- Field 0-300 acres = 0.5 acre
- Field 300-800 acres = 1 acre
- Field 800+ acres = 1.5 acre
-
-
- Fixed = the user defines the smallest area on the map.
Common Issues
- Although the Check Equation button can be helpful, it only points out syntax or structural issues
- Even though your equation’s syntax is valid, it may still produce an odd value
- Make sure to review your equations for incorrect values or functions when troubleshooting
- If the map generated from the equation is blank or missing areas, it can mean that you have a specific value(s) in your input datasets that are not accounted for
- To test for this, add a simple entry at the end of your equation that stats Else/Begin/Result = 0/End and run your equation again
- If 0 rates now show up where nothing was present before, it indicates there are values not accounted for in your equation