Creating a Custom Print Layout specific to an attribute:
- Create New Map of a Layer you would like to print
- Right-click and select Print
- Choose Print Custom Layout
- If a print layout already exists that will work for the users needs, select the layout and choose Print Custom Layout at the bottom and continue to step 4
- If no layout is available to use, select New Print Layout and follow this video (Save the layout to the default location to ensure it will migrate successfully, failure to do this will result in the layout not working after an update):
-
- Right-click on the map and select Edit Properties
- Select Add under the layer
- Under Dataset Based Layer select Enable
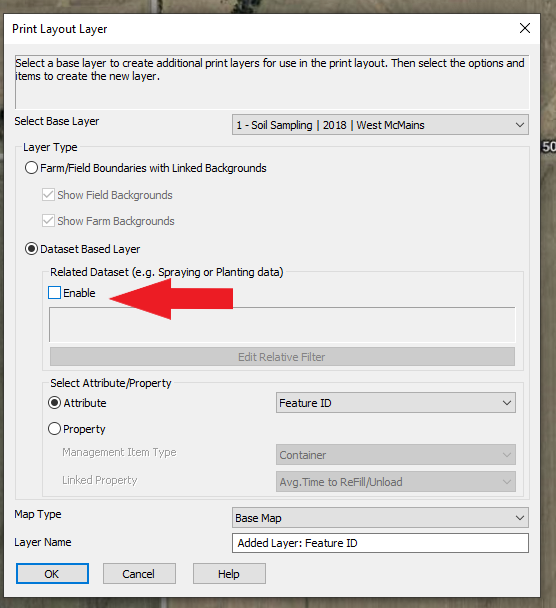
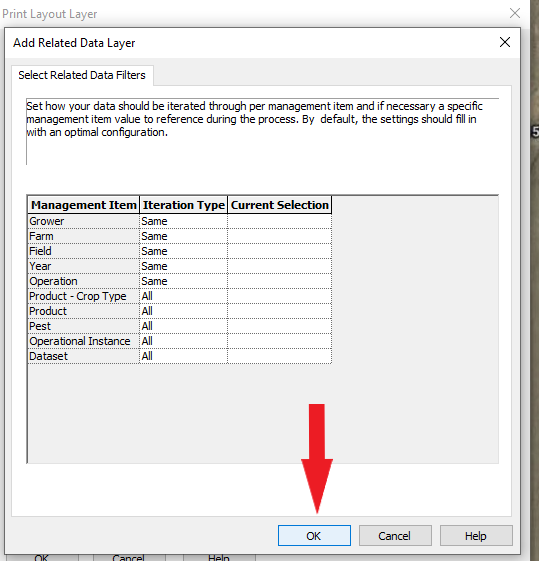
- When the Add Related Data Layer dialog opens, nothing should need to be changed. Select OK
- In the drop-down for the attribute, select the attribute you wish to be displayed. Ex. Soil pH, Soil OM, etc.
- In the map type drop-down, select which map type you want. Ex. Base, Swath, Grid, or Contour
- Label the layer name
- It is recommended to leave on the attribute so it is easier to remember when printing later
- Select OK
- Select OK again in the next window
- In the layer drop-down, change it to the added layer with the custom name given above
- Choose File - Save As, and save the layout
- It is recommended to save the layout using the attribute name
- Repeat for any additional attributes, as needed
Adding new print layouts to a booklet:
- Go to Analysis - Booklet Printing
- Select to edit an existing booklet or create a new one following this video:
-
- Navigate to the Booklet Item Selection page
- Select the appropriate management item type. Ex. Grower, Farm, or Field
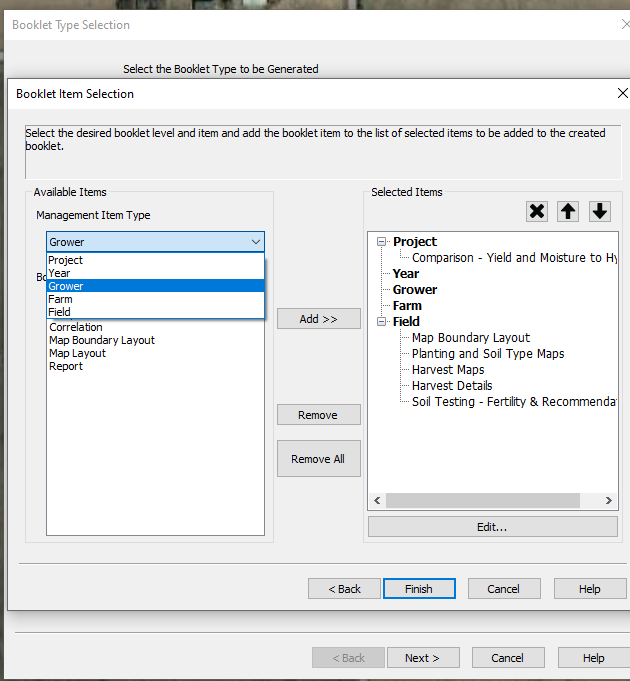
- Select Map Layout and Add
- Enter a custom name which has the attribute in it for future reference
- Choose Next and select the map layout with the attribute from earlier
- Select Next
- Select Finish
- Repeat for any additional attributes as needed
Note: When you run the booklet, the booklet preview will not show the different attributes until you actually print the map (test using print to pdf). The preview only shows the default layer settings.