Difference between Freeze Boundary and Trace Boundary:
Freeze Boundary adds approximately half a swath width to the field boundary.
To Freeze a boundary:
Trace Boundary will trace along the edge of the outside swath. This method will take longer than Freeze Boundary, but creates a more accurate boundary.
To Trace a boundary:
- Right click on the as-applied map you would like to use as the boundary
- Click Trace Boundary…
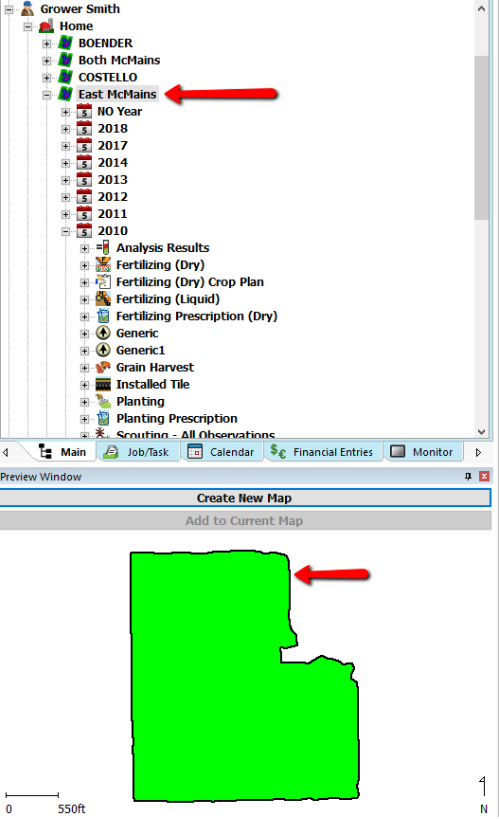
- Click on the field name, the shape of the field should now appear in the Preview Window with a black outline.
If you would like to have the Boundary Operation appear in the Management Tree continue with Steps 4-12
- Click Create New Map
- File -> New -> Boundary Layer
- Under Special Tools on the right side of the Boundary Editor, select Copy From Layer
- Next -> Next -> Copy Spatial Data -> Finish
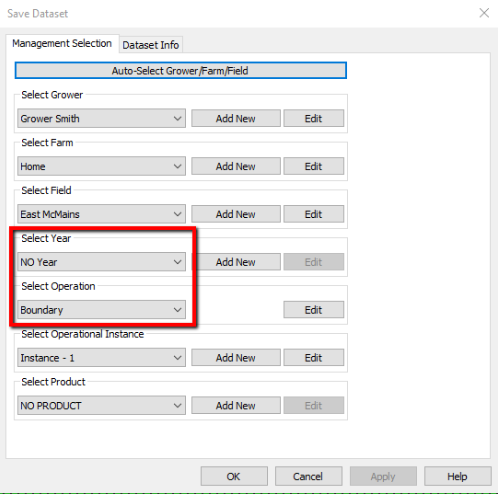
- File -> Save As
- Select the correct Grower/Farm/Field, change Year to NO Year, and make sure Operation is on Boundary.
- A boundary operation will now be present under NO Year in the Management Tree
- To set the new boundary operation as the Field Boundary, expand the Boundary Operation within the Management Tree to the Dataset Level.
- Right Click on the Dataset Level and click Set As Field Boundary
Manually creating a boundary from an existing data.
The tutorial below will guide you through the steps to manually create a boundary from an existing dataset.
It is important to remember that different correction sources (Terrastar, RTK, WAAS) will have an effect on recorded boundaries if you plan on recording with one type and exporting to another.

