Batch Command Functions
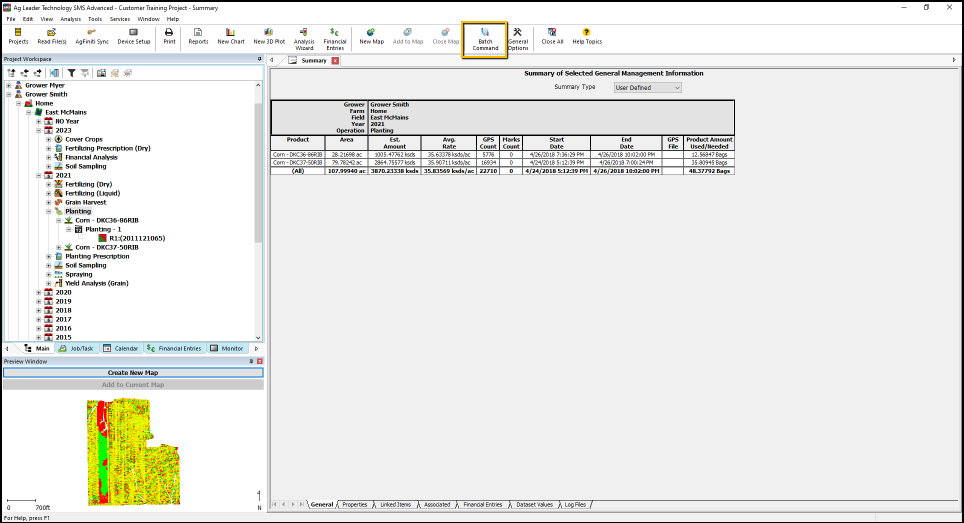
To begin the Batch Command Process, select the Batch Command icon from the Main Toolbar.
 Note: SMS Basic users will have limited batch command tools.
 Batch Command Simple Analysis
Simple Analysis is a quick and effective way to adjust data that was imported from a monitor or created in SMS. With batch command, you can add simple analysis to a vast amount of datasets all at the same time.
In this example, we will add the Simple Analysis Optimize Swath Width function to all of Grower Smith's 2020 Grain Harvest data.
1. Select Add Simple Analysis and the Simple Analysis Function you would like to use. In this case, we chose Optimize Swath Width.
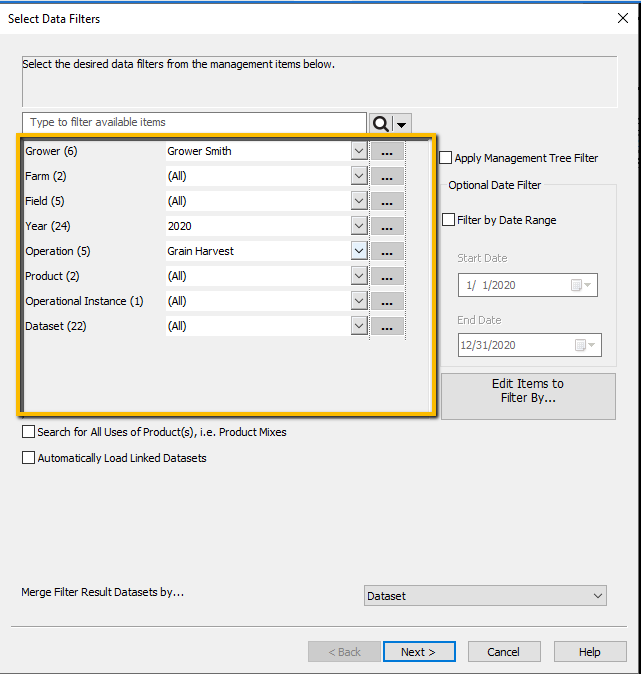
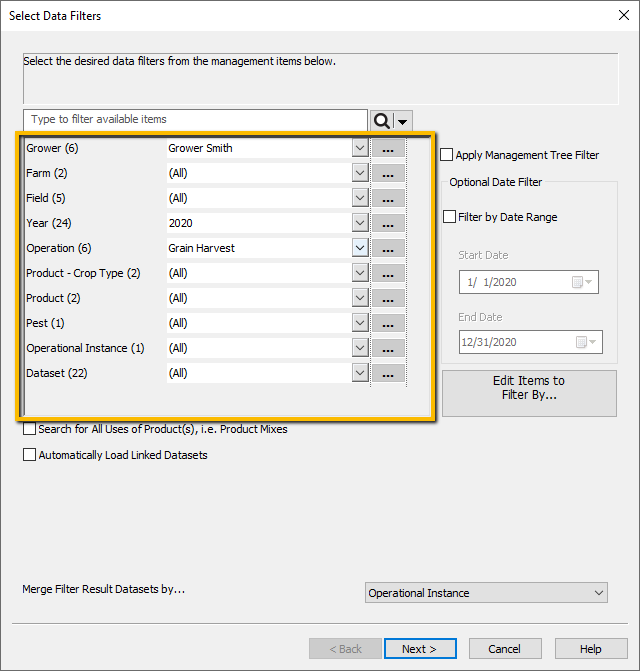
2. The Select Data Filter menu will appear. Select the data you would like to apply the simple analysis to. In this example, we added it to all of Grower Smith's 2020 Grain Harvest data. We selected Grower Smith as the Grower, 2020 as the Year, and Grain Harvest as the Operation.
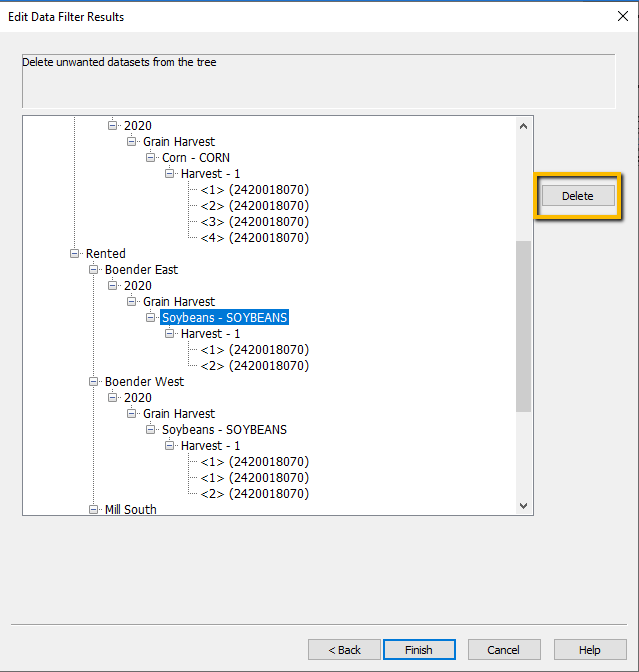
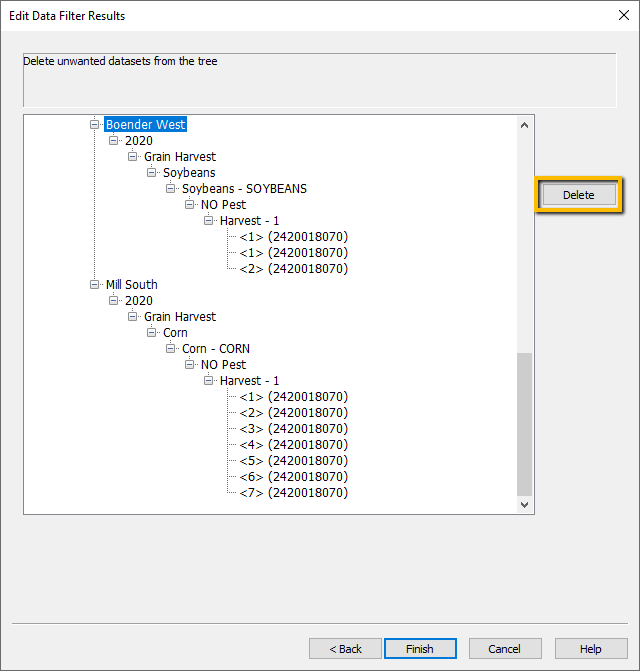
3. SMS will pull all the datasets that fit the filter settings and place them into the Edit Data Filter Results menu. Here, you can delete any datasets that were in the filter settings, but do not want to apply the simple analysis to, by clicking on the dataset and selecting Delete.
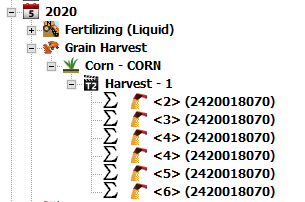
4. Select Finish. The simple analysis will be run for each dataset. Datasets that have had a simple analysis applied to them, will now show a sigma symbol next to them.
Batch Command Import
Batch Command import is a quick and effective way of bringing in large amounts of data files using the same format. This is especially useful when importing multiple shape (.shp) files.
In the example below, we will import a batch of Grain Harvest .shp files.
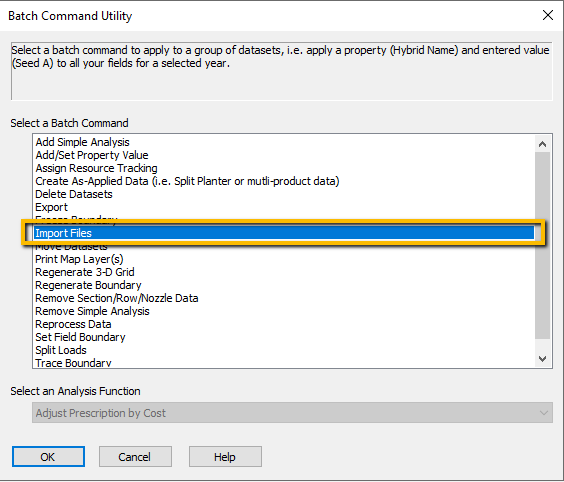
1. Select Import Files in the Batch Command Utility menu.
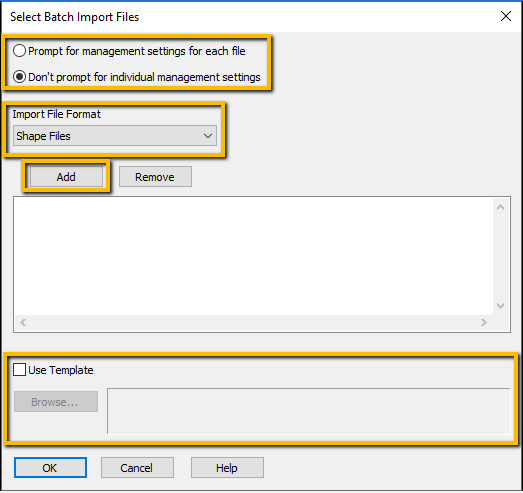
2. The Select Batch Import Files window will appear. There are 2 options for importing data:
a) Prompt for management settings for each file: Use this setting to manually select the management settings for each file. Every time a file is being processed, you will have to set the Grower/Farm/Field.
b) Don't prompt for individual management settings: This will not prompt you to select the management settings for each file.
In this example, we are going to set it to “Don't prompt for individual management settings”, since all the files imported are for the same grower and farm. We will set the field name in a later window (Assign Columns to Import).
Select the File format of the files you are importing into SMS. Click Add to select them from your desktop. Once they are all selected, there is the option to apply a template to them if you already have one created. In this case, I do not have one, so we will leave it unchecked. Select Ok.
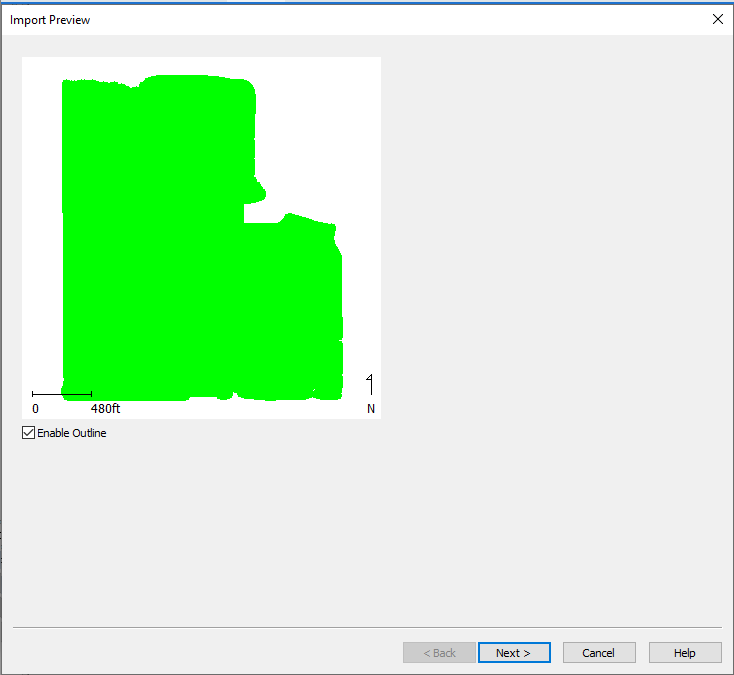
3. The Import Preview window will appear. This will show an outlined preview of the first file being read in.
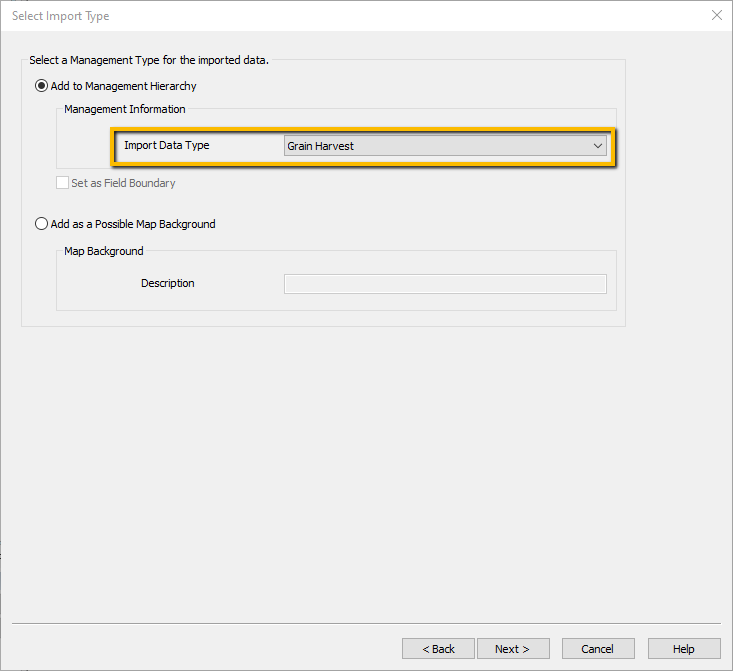
4. Select Import Data Type is the next window. Here, you will select what operation aligns with the data you are bringing in. Since the data is harvest data, we set the type as Grain Harvest.
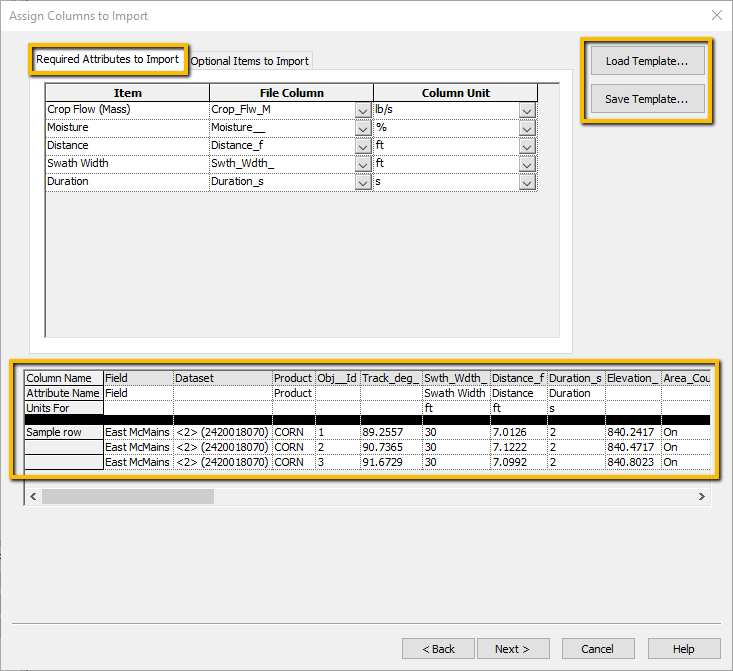
5. The Assign Columns to Import menu will then appear. Based on the Import Data Type selected in the previous window, SMS will show the required attributes it needs to import the data. You can also load a previously created template, or save a template of the attributes assigned.
- The table across the bottom shows a preview of the data that is within the .shp file. As you assign attributes, you will notice the Attribute Name and Units For rows will begin to fill in.
- For additional information regarding assigning attributes, reference this article: Assigning Attributes in Shape and CSV Files
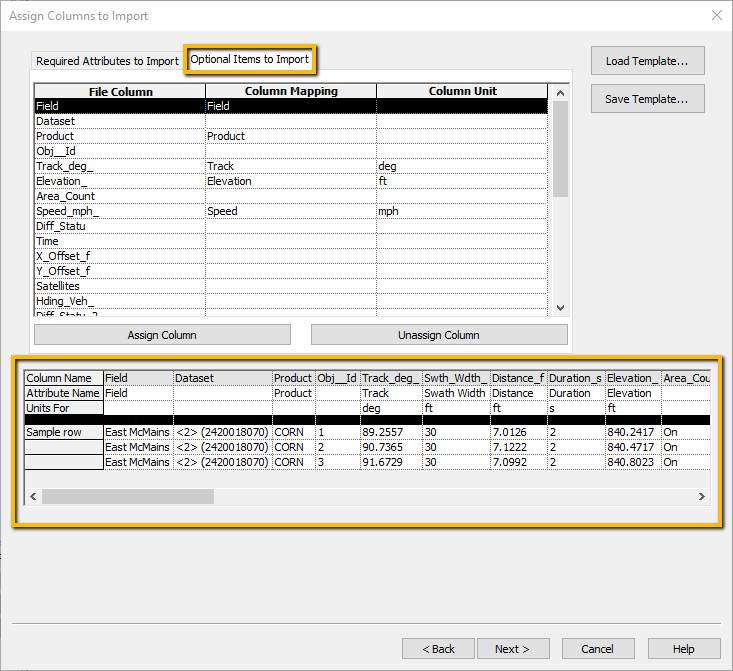
The Optional Items to Import tab will allow you to add additional data that was recorded. We assigned Field and Product as a Management Item to import because all the .shp files we are importing do not have the same field name nor the same product.
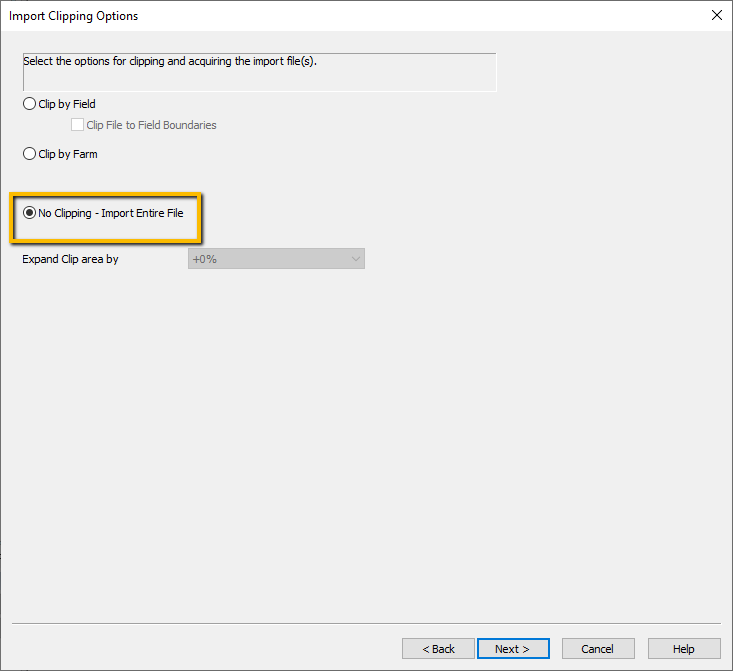
6. The Import Clipping Options screen will appear. The default setting is "No Clipping - Import Entire File". This usually does not need to be changed. However, here are descriptions of what each option does:
-
- Clip to Field - Select this option to use the rectangular bounding area of your field boundaries to clip an imported image to.
- Clip Image to Boundaries - Select this option if you want to clip the imported image to the exact shape of your field boundaries.
- Clip by Farm - Select this option to clip the imported image to each of the Farms you have defined in the software, based on the boundaries of all the Fields you have assigned to each Farm.
- Clip by Manual Selection(s) - Select this option to manually select rectangular regions on an import image to base clipping on. This is useful when you have a very large import image, and you only need to import small portions of the image into the software.
- No Clipping - Import Entire Image - Select this option to import the image as is, without any clipping.
- Expand Clip Area by - This setting allows you to select a percentage of either 0, 10, 25, 50% or to 1 square mile to expand the clipping area that will be used to clip and import your image. An example is if you are downloading from the internet, and you are using the Clip to Fields option, and you would like to have additional area surrounding your fields downloaded.
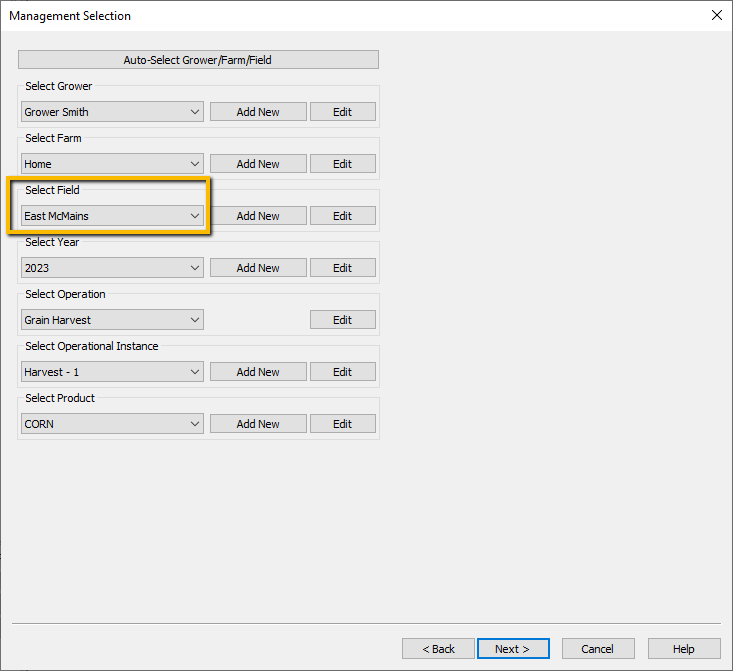
6. In the Management Selection Window, select the G/F/F/Y/O/OI/P. Since we did not assign a Grower or Farm in the Assign Columns to Import menu, we need to assign them here. However, we did assign the Field and Product. We still need to assign a field and product in this menu, but it will not matter what is selected because it will be overwritten with the field and product name in the .shp. Since we assigned it in the Assign Columns to Import menu, this will be overwritten by the Field Name and Product in the .shp.
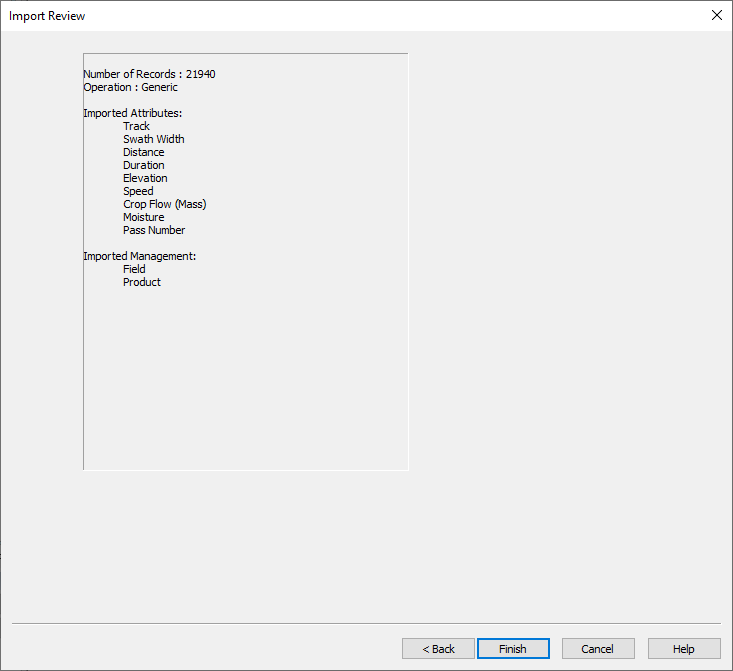
7. The Import Review window will appear. This reviews all the attributes and management items you chose to bring in.
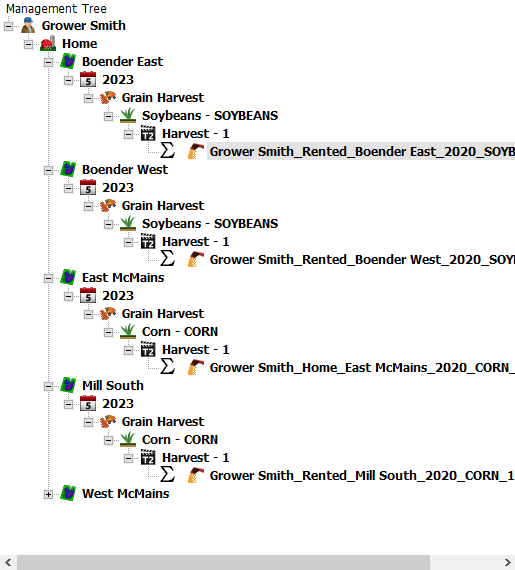
8. The files will be processed, and the data will appear in your Management Tree.
Batch Command Export
Batch Command export is a quick and efficient way to export data as a generic file type to send to other people or programs.
In the example below, we will use Batch Command to export all of Grower Smith's 2020 Grain Harvest data to the .shp file format.
1. Select the Export option within the Batch Command Utility menu.
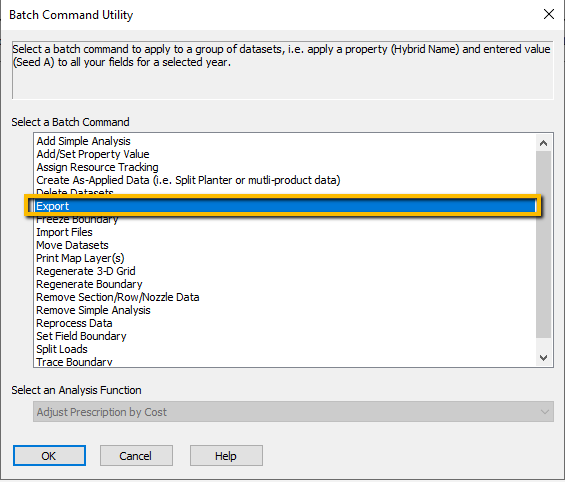
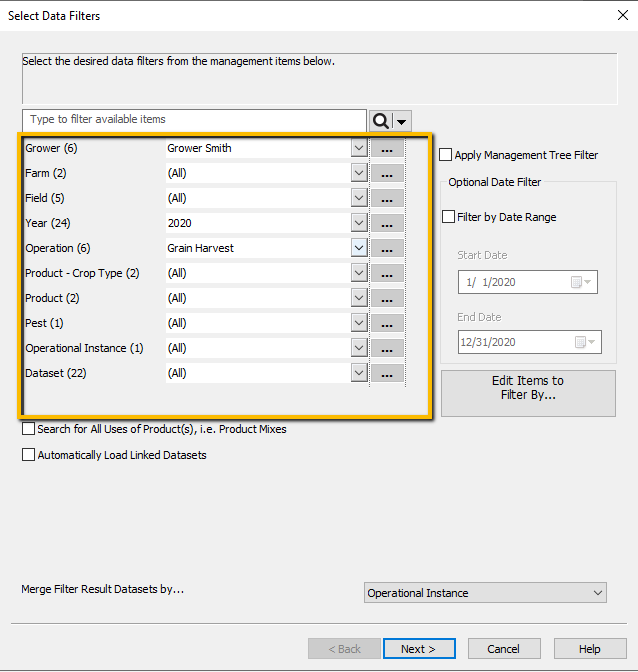
2. In the Select Data Filters window, select the data you would like to export out of SMS. We will export Grower Smith's 2020 Grain Harvest data, by selecting Grower Smith as the Grower, 2020 as the Year, and Grain Harvest as the Operation.
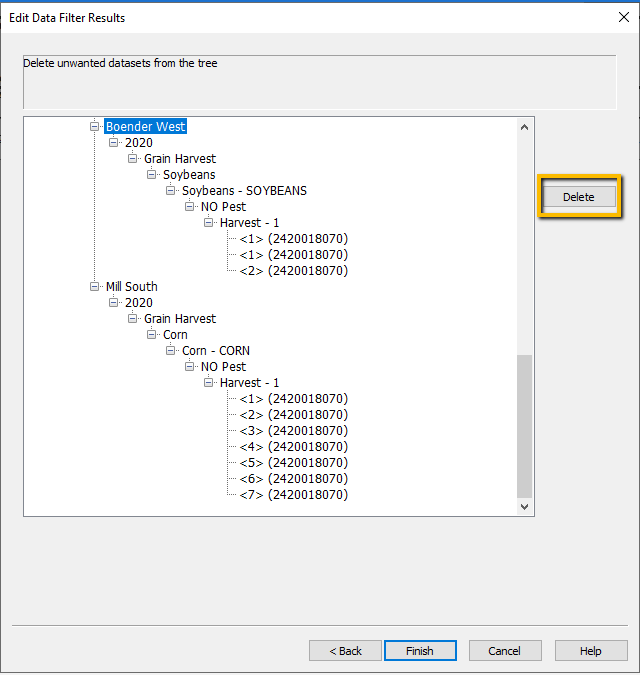
3. SMS will pull all the datasets that fit the filter settings and place them into the Edit Data Filter Results menu. Here, you can delete any datasets that did fit your filter settings, but you do not want to export. You can delete these from export by highlighting them and selecting delete.
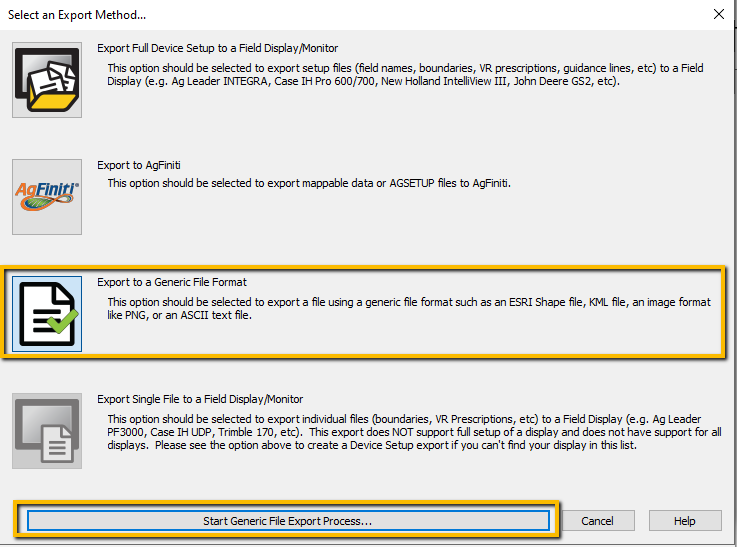
4. SMS will prompt you to choose a File format to export these files to. We will select Generic File Format, since we want to export Shape Files. Select Start Generic File Export Process.
5. Select the file type you would like to export the files as. In this example, we selected .shp in the right-hand side. Select Export to Selected File Format.
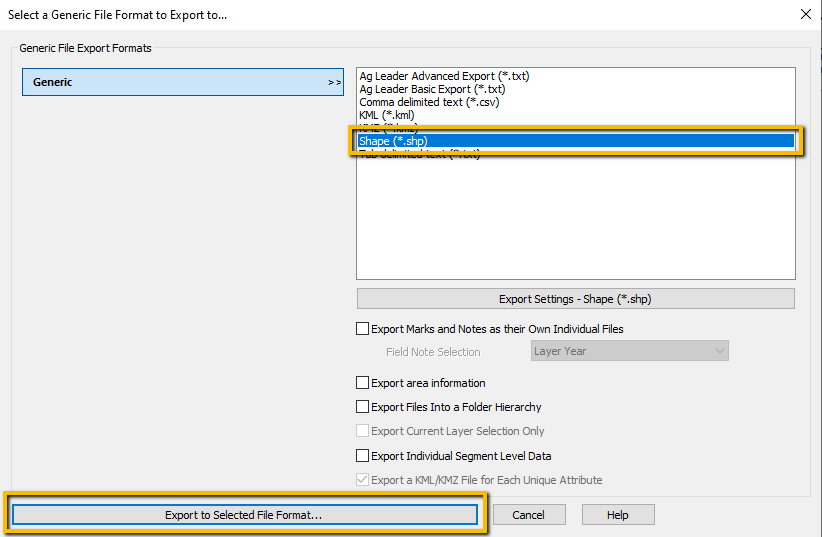
6. The Browse For Folder menu will appear. In this menu, select the location you would like to export the files to. Click Ok.
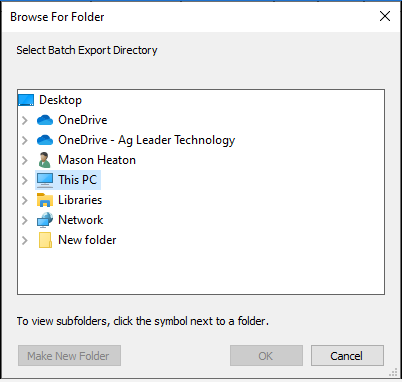
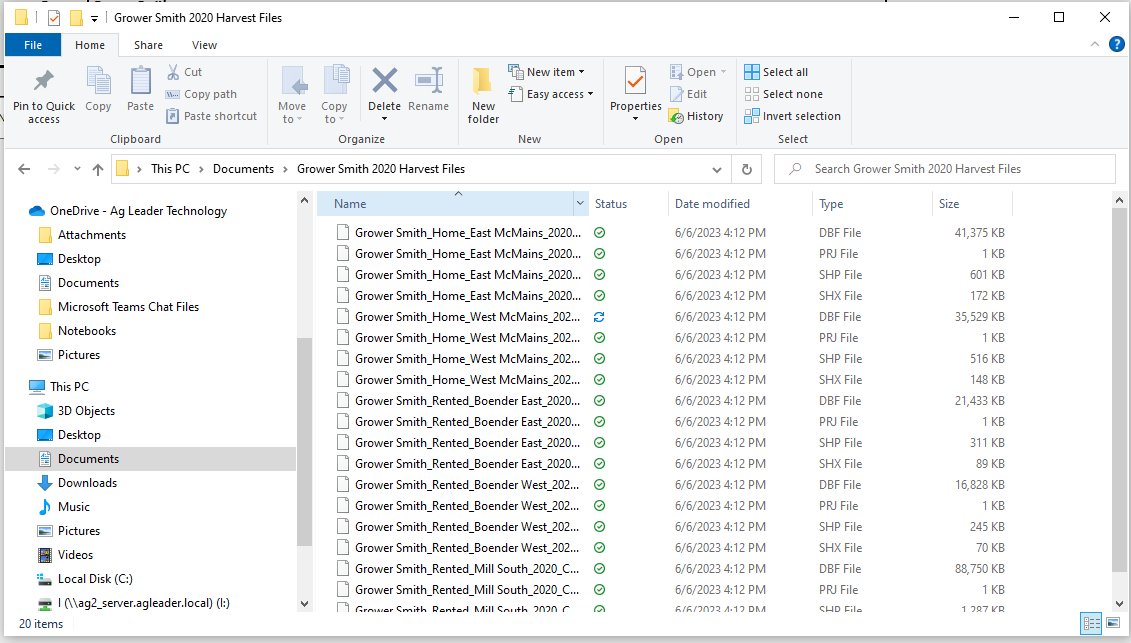
7. SMS will export the data to the location selected as .shp files.
Note: .shp files will also export .dbf, .prj, and .shx files.
Batch Command Printing
Batch Command Printing is a quick and effective way to print maps for a large amount of fields. For more information on SMS printing, reference the article Printing with SMS.
In this example, we will print grain harvest maps for all of Grower Smith's 2020 Grain Harvest Data.
1. Select the Print Map Layer(s) from the Batch Command Utility menu.
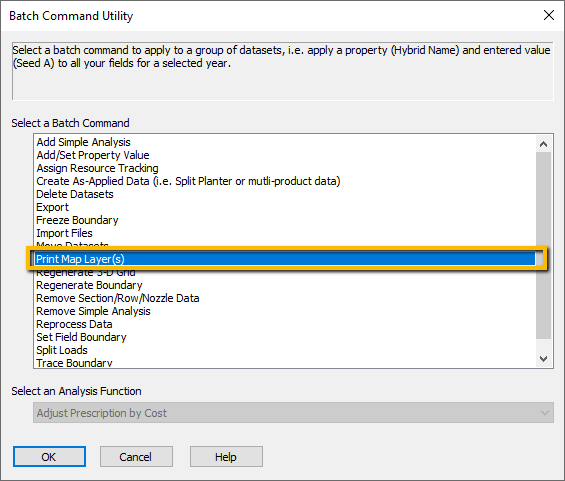
2. In the Select Data Filters menu, select the data that you would like to print maps of. We will print all of Grower Smith's 2020 Grain Harvest data, by selecting Grower Smith as the Grower, 2020 as the Year, and Grain Harvest as the Operation.
3. SMS will pull all the datasets that fit the filter settings and place them into the Edit Data Filter Results menu. Here, you can delete any datasets that did fit your filter settings, but do not want to print maps of. You can do this by highlighting the in the list and selecting delete.
4. The Batch Print Map/Layer(s) window will then appear with map of one of the fields. Here you can edit, add, and adjust how the data will be printed. If you have a previously created Map Layout, select file in the top left and Load Layout.
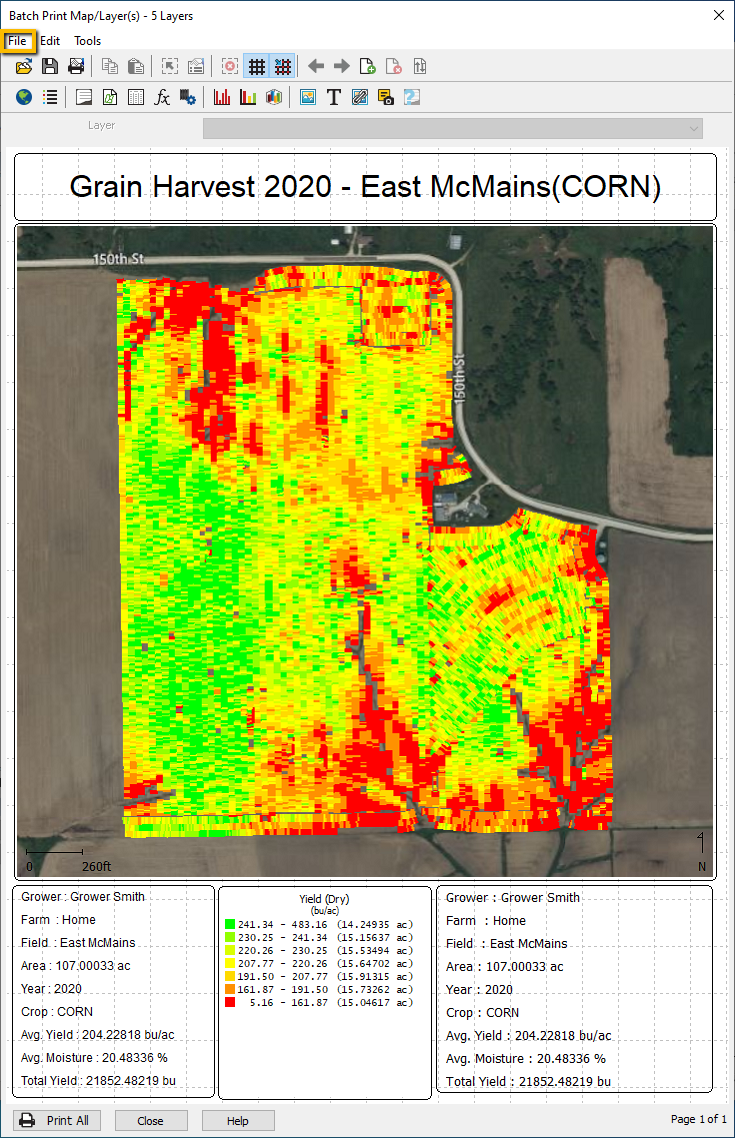
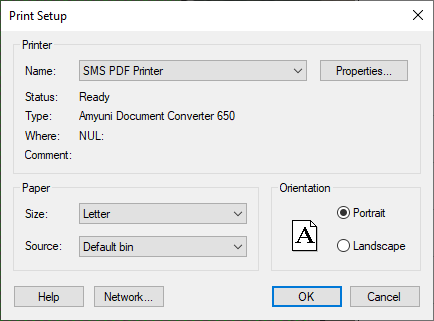
5. After the map is to ready for printing, select the Print All button in the bottom left. The Print Setup menu will then appear, where you can select your printer and preferred format.